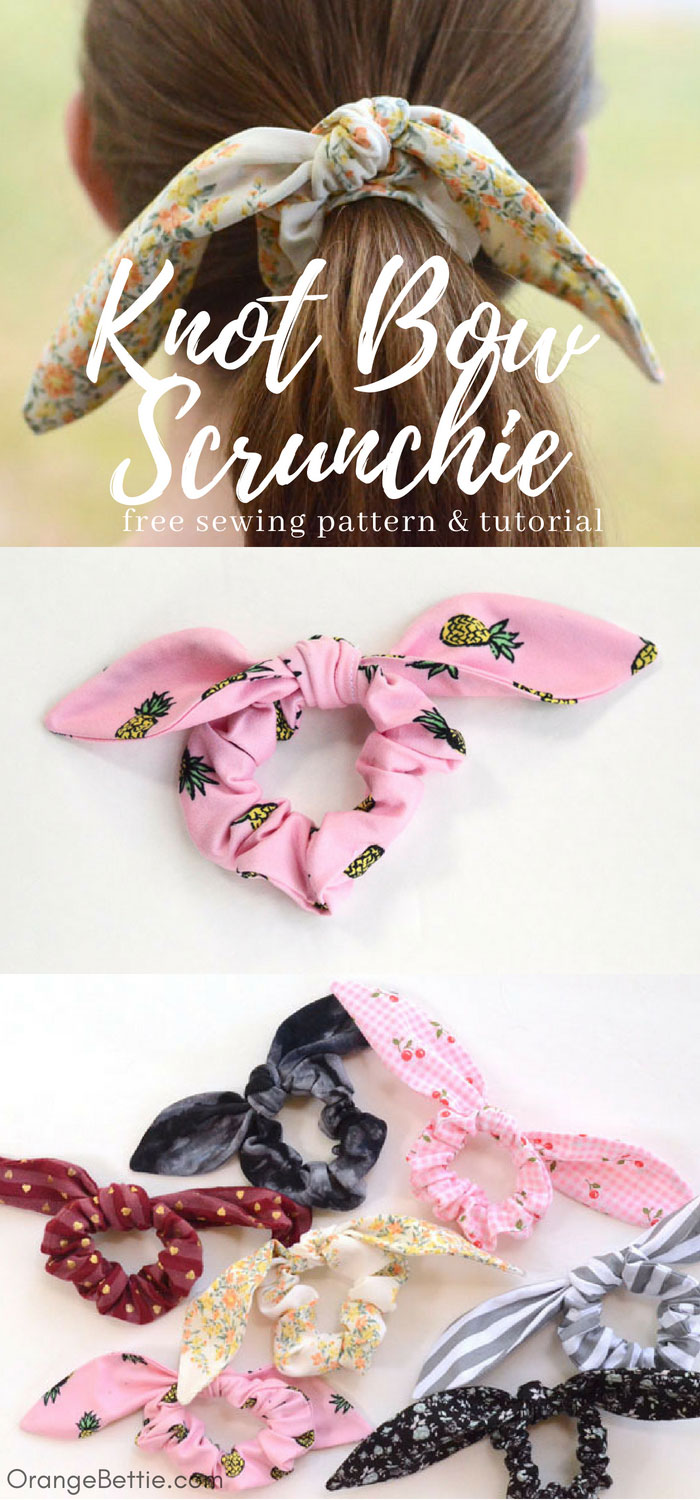
This easy knot bow scrunchie tutorial is crazy simple to make but SO DANG CUTE! Make yourself a whole stack and wear them for almost any occasion!
I was shopping with my teenage daughter a few weeks ago, and – as always – she comes up to me while I’m paying for her stuff and shows me something else she wants. That day, what she wanted was a set of hair scrunchies. I looked at them and said, “You know I can make those, right?” She had no idea I could work such magic. Sometimes my sewing skills impress her.
It was a few weeks later before I had time to sit down and make them for her, but make them for her I did. Within an afternoon I had a whole pile of scrunchies for her. They’re so quick and so easy, I couldn’t stop with just one!
I’m kind of an overachiever so I added knotted bows to them. The knot bow makes it look like you took the time to tie a pretty little scarf, when all you did was wrap that scrunchie around your ponytail. All of the cute, none of the hassle.
I’ve got a tutorial and free pattern for the knot bow scrunchie below!
The pattern includes two bow sizes – a longer bow and a shorter bow. I think the longer bow looks best out of lighter weight fabrics, while the shorter bow looks better out of fabrics that have more body to them. You could also omit the bow altogether and just make a plain scrunchie. Totally your choice.
This is what the longer knot bow scrunchie looks like.

And this is what the shorter knot bow scrunchie looks like.

They don’t take much fabric so check your scrap bin to see what you’ve got that could be sewn into pretty scrunchies. You can use just about any type of fabric for these scrunchies. Stripes, florals, gingham checks. Knits, cottons, silky fabrics. It’s all good when it comes to scrunchies. However you decide to make them, they’re quick and easy and sure to please your teen!
Supplies
Large fabric scraps
¼” elastic
Safety pin
Dull pencil or wooden dowel (to turn a tube right side out)
Prep your pieces
Cut a rectangle of fabric 3” x 16”. Also cut 2 on fold of EITHER the Long Bowor Short Bow pattern pieces.
Sew the scrunchie
Fold the rectangle in half lengthwise. Stitch down one long side with a ¼” seam allowance.

Turn right side out and press.

TIP: I find it’s easier to turn a tube right side out if I stitch across one of the short ends and then use a wooden towel pushed into that closed end to turn it right side out. Then, once it’s turned right side out, I just clip off that stitched end. It makes my fabric tube about ¼” shorter but scrunchies don’t require precise measurements so that’s okay.
Cut 6.5” of ¼” elastic. Use a safety pin to push the elastic through the tube. The tube is longer than the elastic so it will have to bunch up. I like to put a second safety pin at the other end of the elastic to help keep it from sliding up into the tube.

Stitch the ends of the elastic together, close to the cut ends. I sew back and forth several times across the elastic to make sure it’s secured.

Turn under ¼” on one of the open ends of your fabric tube. Then, slip the other end of the tube inside, overlapping by ¼” or so.

Top stitch close to the folded edge to secure.

The scrunchie is finished! Now for the knotted bow…
Sew the knotted bow
Place the two bow pieces right sides together and stitch around all sides with ¼” seam allowance. Leave an inch or so to turn right side out.

Clip corners and curves, then turn right side out. The fastest way to do this is to turn it like a tube, using a dull pencil or dowel to push the ends of the bow through the turning hole.
Give it a good press with the iron. Then, press the seam allowances in at the turning hole and top stitch close to the edge to close the hole.

Tie the bow around the scrunchie and you’re done.

Don’t even try to stop at just one!! Go ahead and sew up a stack of them!


Latest posts by Anne Weaver (see all)
- Spring Flower Tote Bag – Free Sewing Pattern - April 6, 2024
- St. Patrick’s Day Shamrock Banner Free Sewing Pattern - March 7, 2024
- Upcycled Sweater Valentine Zipper Pouch Sewing Tutorial - February 12, 2024
Makingdresses for grsnddsughter.these will be such. Cute accessories.THANK YOU
I can’t find a pattern for the bow. How long are they? They are really cute & I want to make a “bunch” for my great-granddaughter. Thank you.
Here is the pattern: https://drive.google.com/file/d/12usRnVxhowJG-LhYzFiLyqBIZ69qHswq/view
When finishing the scrunchie with a topstitch, are you sewing by hand or with the machine? Same question when closing the hole on the bow! Thanks for your help!
You could sew it by hand, but I’m being lazy and just sewing it by machine. Top stitching by machine is more visible, but the stitch lines will be hidden when you tie the knot. –Anne
it will not allow be to print out the template
It worked when I just tested it, so I’m not sure what to tell you …. ?? Sorry!
me neither so I just did control P / or command P if you are a Mac and it worked.
Your text above says a 3 x 16 length of fabric and the pattern says 3 x 14. Which would you recommend?
Thanks! I’m so excited to make some!!
That’s my mistake! I had originally used 14″ but then decided to go with 16″. The only difference is the longer piece of fabric makes more “scrunch” in your scrunchie. I’ve updated the pattern to match the instructions. –Anne
Brilliant explanation and pictures. Thanks for putting together such an easy to follow tutorial.
Recently my friend and I went to Target. We came across a similar hair tie. She was tempted to purchase it until she looked at the price. It was $10 for one hair tie! I’m making these as Galentine gifts for my sisters and friends. I’ve completed a few and think they look best with prints more than solid colored fabrics. Thanks for the easy tutorial and making these cute accessories affordable.
I’m so thrilled this tutorial has been useful for you! Hooray for scrunchies! 🙂
Thanks, I can’t wait to make my granddaughter some of the scrunchie bows and some matching face mask for her.