My mother recently mentioned that she needed some new pot holders for her kitchen. Now, pot holders are not exactly something that you jump at the chance to buy, so chance were that she would never actually buy herself some new pot holders. Luckily I can sew, so I could make her some special pot holders. I’d get the chance to do something nice for her, and she’d get a nice new set of pot holders.

That’s what my mama calls a two-fer!
I’m so excited to give these to my mother! I know she’s going to love them!
Read on for the tutorial showing how you can make one of your own – plus a free pattern you can use.

The design of these quilted pocket pot holders is really pretty simple – just a rectangle with a rounded bottom and a pocket on the front. The edges are all finished with bias tape.

The simple lines of these pot holders will show off a pretty fabric. I chose fabrics that would match my mother’s vintage style kitchen in her 1920s house. I love the vintage style of these prints from American Jane!

But if vintage isn’t your thing, you could totally change up the look of this pot holder by just using a more modern print.
Each pot holder measures approximately 7” wide x 10” tall, which gives good coverage and plenty of room inside the pocket for your hand.

The quilting, with layers of batting and Insul Bright insulated backing, provides good protection against a hot pan. And the loop at the top makes it easy to hang your pot holders from a hook so they’re always within easy reach.

Supplies
For each pot holder, you’ll need:
Main fabric – Quilting cotton, 20” tall x 9” wide
Backing fabric – Quilting cotton, 20” tall x 9” wide
Insul Bright – 20” x 9”
100% cotton batting – 20” x 9”
Bias tape – 50 inches
Temporary spray basting glue (optional)
Temporary fabric marking pen
Glue stick
To make a pair of pot holders, just double all of the fabric requirements. You can make two pot holders from a standard ¼ yard cut of the main and backing fabric. A fat quarter, however, is oriented the wrong direction to get two pot holders from it, unless your fabric is non-directional and your print will look okay oriented sideways.
Prepare your fabric
DO NOT CUT YOUR PATTERN PIECES YET. We are going to quilt the fabric together before cutting out the pieces. Start with fabrics all cut to 9” wide x 20” tall.
If you are making a pair of pot holders, you can double the dimensions and quilt all of your fabric at the same time. Just make sure the direction is right so you don’t end up with a sideways print on your pot holders.
Create a quilt “sandwich” with the following layer:
- Backing fabric, face down
- Insul Bright
- 100% cotton batting
- Main fabric, face up
Baste the layers together with temporary spray basting glue to keep them from shifting.
Temporary spray basting glue is a supply pretty specific to quilters, and it’s pricey. If you don’t have some on hand already (as I didn’t), you can also use a glue stick to baste the layers together. If you use a glue stick, just give it plenty of time to dry before quilting it. I let mine sit overnight.
Quilt the layers together. I used a 1” diagonal grid for my quilting design, but you could do stripes or any other design you like. Use a temporary marking pen to mark your lines before stitching.
Cut the pattern pieces from your quilted fabric.
Finish the pocket edge
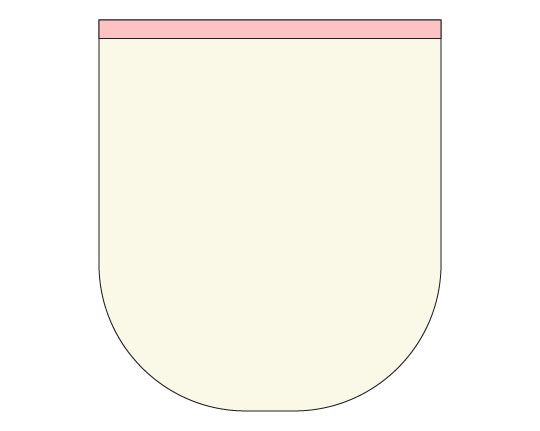
Open up your bias tape and place it across the top of the Pot Holder Front, with RST and raw edges touching. Stitch in the ditch of the fold.
Note: In my illustrations I used green to show the main fabric and cream to show the backing fabric.

Wrap the bias tape around the raw edge of the Pot Holder Front and over to the backing side. Use glue stick to glue the bias tape down with the folded edge just barely past the stitch line. Press with a hot iron to dry the glue.
Flip the piece back over (right side up) and top stitch the bias tape down1/8” from the folded edge.

Assemble the pot holder
Place the Pot Holder Front on the Pot Holder Back, wrong sides together, and lined up at the bottom. Use clips to hold in place. Baste in place with 1/8” seam allowance.

Zig zag around all sides with a short, wide zig zag stitch. This will even up the edges and help compress all those thick layers. The settings I used on my Bernina were a 3 width and a 1.5 length
Finish the edges
Now we’re going to finish off the edges of the pot holder much like we finished the edge of the pocket. There are a few things we’ll do differently though.
Starting in the top left corner, open up the bias tape and place it along the edge of the pot holder, raw edges touching and right sides together. Stitch in the ditch a little to the inside of the crease. Normally we’d stitch directly in the crease, but we’ll be going around some thick edges so I like to have a little more tape to wrap around.

When you get to the top right corner, you’ll need to miter the corner. See how here.

When you get to the curved bottom, ease the bias tape around the curve.
And then, when you get all the way around to where you started, stop stitching just before the beginning of the tape. Leave a 3.5” tail of bias tape.

Now, like we did with the pocket top, flip all of the bias tape around to the back. Glue it in place, then press with a hot iron to dry the glue.
From the front, top stitch the bias tape close to the edge. When you get to the tail, just keep on stitching all the way to the end.

Just a couple more steps and then we’re done! Press ¼” of the bias tape tail to the back.

Turn the pot holder over to the back, and then fold the tail over to create a loop. Stitch across the tape to secure, close to the folded edge.

You’re done!

If you love these quilted pot holders you will also love these sewing tutorials from Anne:

Soup Bowl Coaster Sewing Tutorial


Modern Hexagon Fabric Coasters

Latest posts by Anne Weaver (see all)
- Slouchy Market Bag with Veggie Prints – Free Pattern - May 14, 2026
- Flex Frame DIY Glasses Case Sewing Tutorial - April 18, 2026
- Scallop Zipper Pouch – Free Sewing Pattern - March 10, 2026
Would love to make these as some gifts But can’t print off pattern and it doesn’t say what size to cut them Can you advise
I can email you the pattern download. What email is preferable? Also, I pulled it up and it was about as wide as the page if that helps.
Could you email me the pattern as well, please? Ginnie67@gmail.com
Can you please email me the pattern? Thank you.
Done. Happy sewing! 🙂
Can you advise as to the width of bias tape I should buy?
1/2 inch or 3/8 inch double fold bias tape works best for this project. 1/2″ double fold is a pretty common size if you’re buying bias tape. 3/8″ is a pretty common size for double fold bias tape that you make yourself. Either size will work. –Anne
Hello,
Your potholders are really beautiful.
Can you please email the pattern download for the quilted pocket pot holders please?
olga.pg@shaw.ca
With many thanks,
Olga
I tried to print the pattern but the pages are blank. Could you email it to me or just tell me the sizes of each piece. I can figure out the rest. Thanks!
The pages printing blank may be an issue with the Acrobat plug-in. When you open the file, try clicking the Print button that’s part of the Acrobat application rather than from your browser. It that doesn’t work, here are the measurements. The Pot Holder Front measures 7″ wide by 8″ tall, with the bottom corners rounded. The Pot Holder Back measures 7″ wide by 10″ tall, again with bottom corners rounded. You can use a glass or small plate as a pattern to round the corners. Hope this helps! –Anne
Hi, I saw the Pocket pot holders on your blog and am so excited to make them for my daughters’ and daughter-in-law’s birthdays. so impressed with so many of your ideas. thank you for being so creative.
Unfortunately, right now I Have my layers all done and quilted but cant pull up the pattern for the pocket pot holders. Would you please send me the pattern (or dimensions) .
Thanks so much
Done.
Please email a copy of the instructions for the quilted pocket hot pad. So pretty. Thank you.
To what email address?
Where is the tutorial for this pocket potholder?
The tutorial is the drawings and directions on this post: https://www.bombshellbling.com/quilted-pocket-pot-holders-sewing-tutorial-and-free-pattern/
I had no trouble downloading the pattern and I look forward to making these, which someone on a recent blog hop made and linked to you. Thank you for great directions, and good illustrations.
may i add my request for the cute potholder download ?
thanks
You should be able to download the pattern using the link the post. The pattern download link is located at the bottom of the Supplies list. If the link isn’t working, let me know and I’ll see what’s going on. –Anne
Please email me this pattern, quilted pot holder.
Thank you
You can download it for free! Just look on the post under the “supplies” list. The last item is “free pattern.” Click on that link and you can download and print from there. Happy sewing! 🙂