Bombshell Bling

Crafts, Recipes, Parties and More

  • Home
  • About
  • Tutorials
    • Baby and Kids
      • Kid Crafts
    • Beauty & Fashion
    • Crafts
    • Disney Love
    • Home Decor
    • Jewelry
    • Paint
    • Scrapbooking
    • Sewing
    • Washi Tape
    • Weddings
  • Printables
  • Recipes
    • S’mores Saturdays
  • Parties
  • Seasonal
    • New Year’s
    • Chinese New Year
    • Valentine’s Day
    • St. Patrick’s Day
    • Easter
    • Mother and Father’s Day
    • 4th of July
    • Back to School
    • Halloween
    • Thanksgiving
    • Christmas
  • Our Home
    • Baby Girl Nursery
    • Dr. Seuss Room
    • Little Girl Bedroom
    • Master Bedroom
    • Pokemon Bedroom
  • Family Fun
    • Disney
    • Dr. Seuss
    • How to Train Your Dragon
    • Learning Rocks
    • Reading Rocks
  • Randomness
    • Family Life
    • Mental Health
    • Sunday Spotlights

Doily and Scalloped Edge Cork Wall

April 18, 2014 By Angela Hunt 1 Comment

246 shares
  • Facebook
  • Twitter

Please welcome Angela for another amazing tutorial: Doily and Scalloped Edge Cork Wall.  You should SEE this girl’s house.  Seriously.  I hope she gives us a home tour sometime!!

*******************************
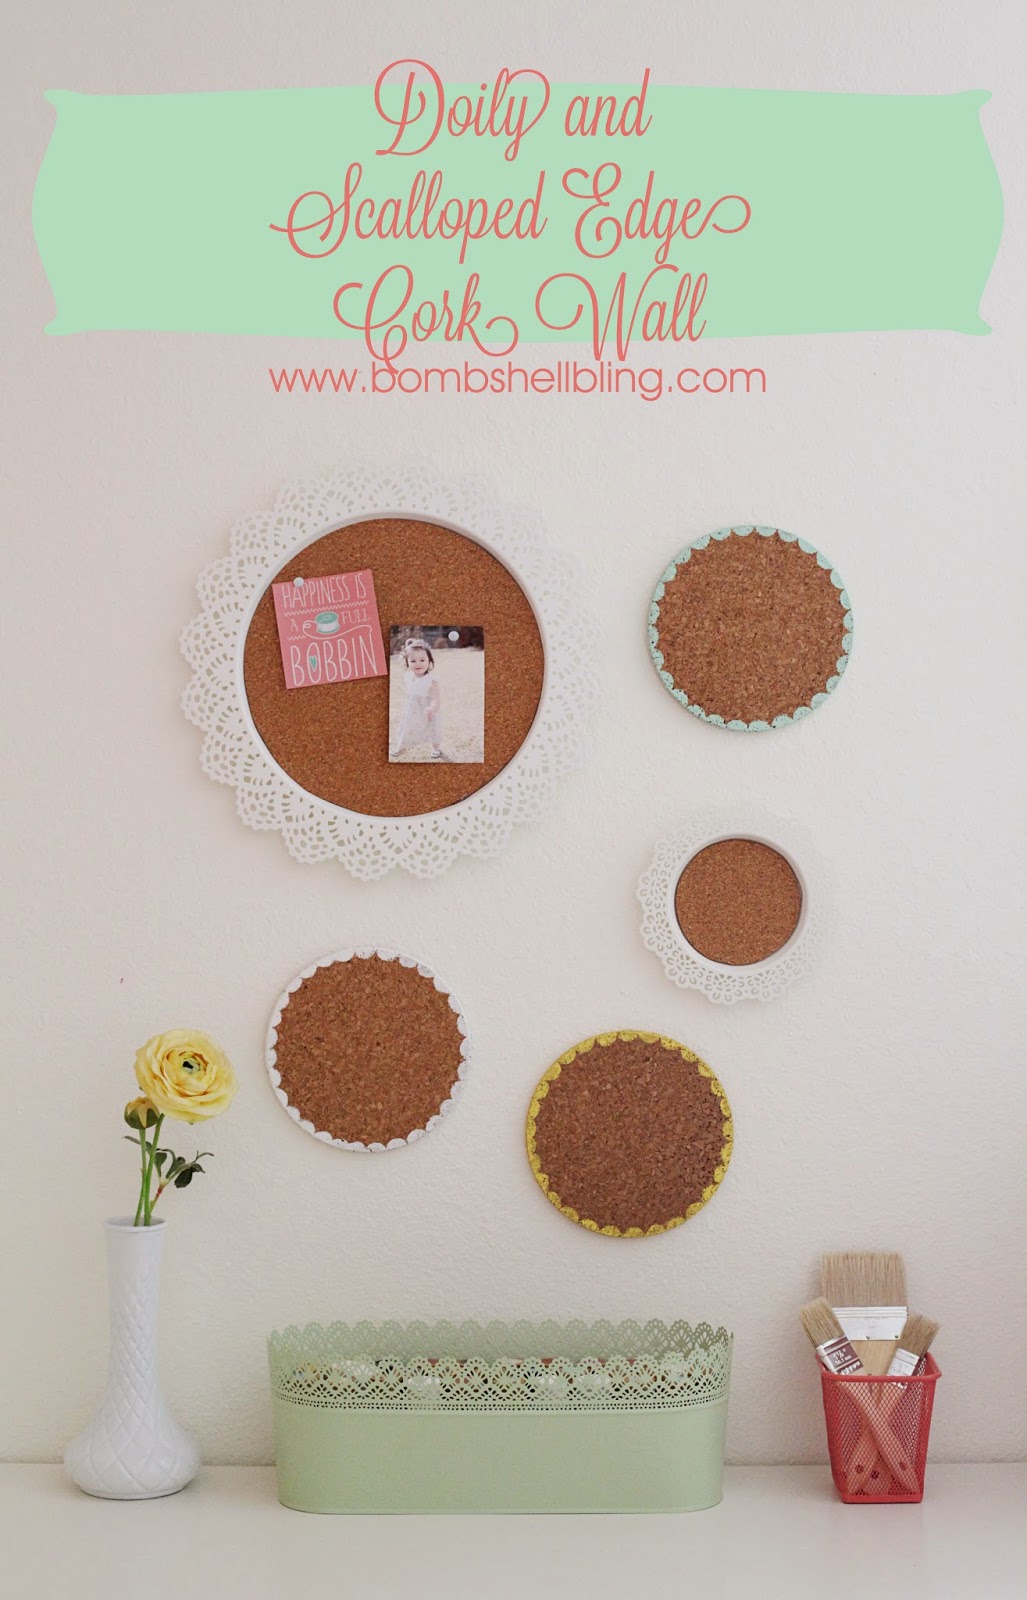
Make a pretty and function cork wall command station for your family using this tutorial!

I am currently obsessed with the SKURAR collection at Ikea. I have always loved doilies, so the fact that Ikea has incorporated the doily look into some of their designs has me going crazy! I have found a way to incorporate something from this collection in almost every room of my home. Yea, I am obsessed! My latest use of the SKURAR candle dishes is to incorporate them into my cork wall in my craft room. It is such a fun, cute, and simple way to create a unique bulletin board!


Here is how I did it:

Gather supplies:

Ikea candle dishes

Cork roll

Ikea cork trivets

Paint

3/4 inch round foam stencil brush

Scissors

Hot glue


Doily cork:

1. Since I used two sizes of candle dishes, I cut two stencils. I cut- well I had my Cricut cut- a 10 inch diameter circle and a 4 1/4 inch diameter circle.

2. I unrolled my cork. You will need something to hold down the edges to keep it from curling up.

3. I traced my circle stencils onto my cork with chalk. The cork is thin. I cut two circles for each candy dish to increase the thickness.

4. I cut out my cork circles.

5. I put a ring of hot glue around the edge of the cork circles. Then I glued them to the candle dishes.

6. I repeated step 5. Each candle dish has two layers of cork. 

And here is the wonderful doily end result!

Scalloped edge cork:

1. Open your cork trivets. 

2. Get some paint on your foam stencil brush.

3. Only using half of the foam stencil brush, dab some paint around the edges of your cork trivets. 

I love these scalloped edge cork boards!
My new doily and scalloped edge cork wall makes me smile!
And I even found a way to incorporate the SKURAR mint green plant pot as my new paint holder! 
 

  • Bio
  • Latest Posts
Angela Hunt

Angela Hunt

Motherhood + Sewing + Fabric + Traveling = All things that bring me joy! Follow along as I share pieces of it all!
Angela Hunt

Latest posts by Angela Hunt (see all)

  • Beauty and the Beast Rose Crown - March 17, 2017
  • Sailor Bow Tutorial and Pattern - February 16, 2017
  • Halloween Luncheon - October 6, 2016
246 shares
  • Facebook
  • Twitter

Filed Under: Home Decor, Tutorials

« Dr. Seuss Room: Book Page Pennant Banner
Sunday Spotlight: I Heart Naptime »

Comments

  1. Crystal Nell says

    April 18, 2014 at 6:46 pm

    Those are super cute!! My daughter has the white tray from IKEA. She loved your idea. Thanks so much!! Pinned 🙂

    Reply

Leave a Reply Cancel reply

Your email address will not be published. Required fields are marked *

SUBSCRIBE

Thank you for subscribing!

There was an error submitting your subscription. Please try again.

Archives

Disclosure and Privacy Policy

Blog Parties I Link To

Archives

Copyright © 2026 · Tasteful theme by Restored 316

Copyright © 2026 ·Tasteful Theme · Genesis Framework by StudioPress · WordPress · Log in