*I recieved the fabric for this apron from Riley Blake free of charge so that I could create a tutorial for their blog. All ideas and opinions are 100% my own.

I am ready for spring. Are you ready for spring? It has been a snowy winter pretty much all over the country, so I bet more than a few of you agree with me! I think snow is beautiful, but I’m sick and tired of being freezing cold with wet feet! Even my boots aren’t keeping me dry this winter! Last week I went to visit my sister and her precious new baby in San Diego (aka paradise) and it gave me the spring fever bug! Bring on the SUNSHINE!!! So, today I am going to show you the springy toddler ruffle apron tutorial that I shared last month on Riley Blake’s Cutting Corners blog. Bring on the springy mood!
Years ago I made my son an apron and a matching chef’s hat for his second birthday. In fact, it was the first sewing project that I had ever attempted unsupervised! I had sewn with my mom’s help some, but this was the first time that I tried something on my own. My mother-in-law had just gifted me a sewing machine for my birthday, so I decided to be bold and just go for it. It has been almost three years now, and my boy still wears his apron every time that we cook together, which is often. He is not as willing to wear his chef’s hat, however. It still looks brand new. Stinker. Anyway, my daughter just recently started showing interest in cooking with me, and she is always so jealous of her brother’s apron. I have found her wandering around with it hanging from her neck like a tie many a time. Cutie-patootie.
I was planning to make a brand new apron pattern, but then I thought, “You know….why reinvent the wheel?” So, instead, I am going to share with you the link to the pdf pattern from Mama Liberated that I used so many years ago, and then I am going to show you in pictures how I modified it to fit a tiny, floofy little diva. So, here we go!
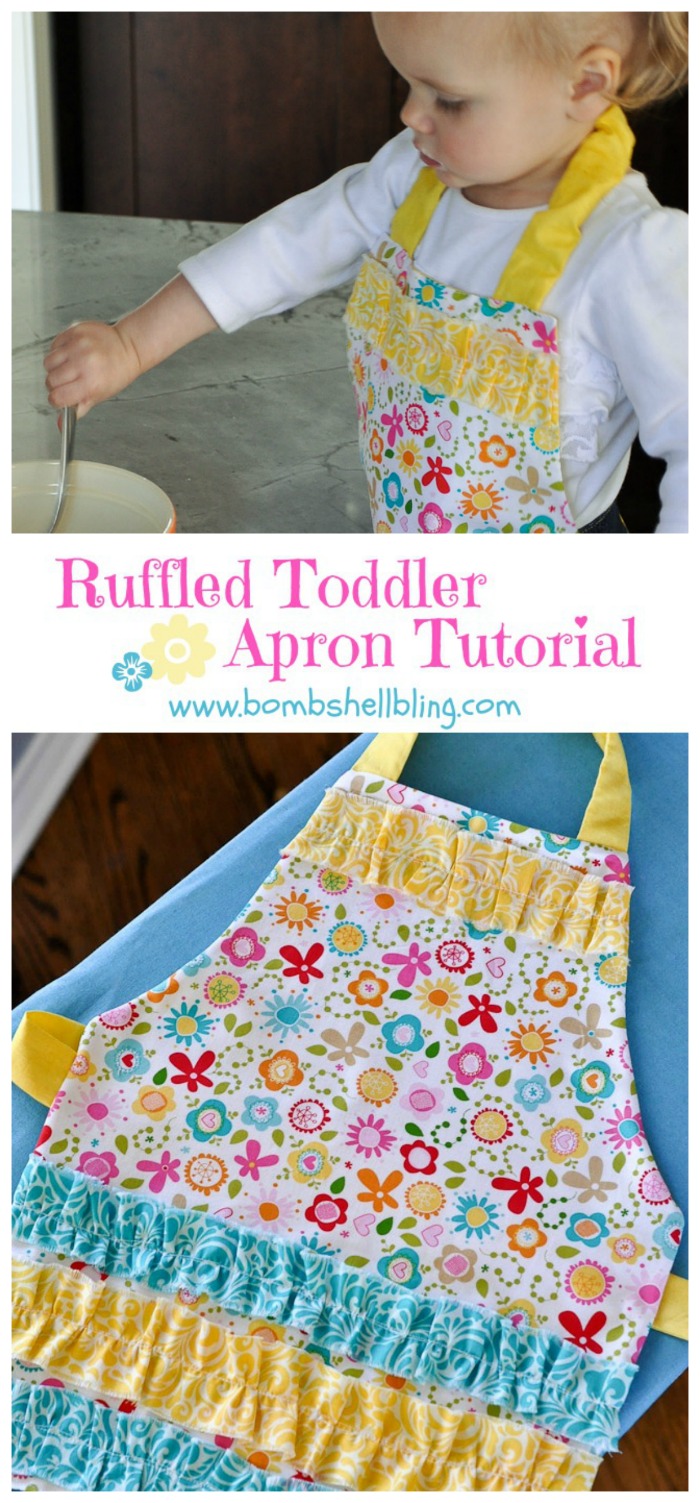
For this apron I used the new line of Summer Breeze Cotton fabric. Here are the exact supplies that I needed:
* About 3/4 yard of Summer Main White
* About 3/4 – 1 yard of Cotton Shade Citrus (You need more of this because it is the fabric for the backing as well as the straps.)
* 1/4 yard Summer Splash Blue
* 1/4 yard Summer Splash Yellow
* a small amount of white velcro
* about 15 inches of 3/4″ wide elastic
* straight pins and white thread
* scissors and a measuring tool (a rotary cutter and mat will speed things up if you have one)
* THIS PDF PATTERN
Ok, start by printing out that PDF pattern and cutting out the pieces. Here are the changes that I made: Since my daughter is tiny, even for her age, I modified the apron pattern a bit. I left the body measurements as they are, but I took off four inches from the waist strap measurement.
Now, you will need to cut four extra strips for the ruffles! The modifications that I made were only in the neck and waist straps (mentioned above) and adding the ruffles. The body of the apron is 14 inches across. If I were making a mega ruffled twirly skirt or something, I would double the width of the body in order to make the ruffles, but I wanted these to be more gathered and subtle, so I just added half as much as usual. In short: Cut four strips for the ruffles that are 1.5″ wide and 21″ long. Two of the strips should be Summer Splash Yellow and two of the straps should be Summer Splash Blue.
PRIOR to following the sewing instructions on the PDF pattern you will need to deal with the ruffles. So let’s get started with the picture portion of this tutorial, shall we?

You should have your four ruffle strips precut. (1.5″ wide by 21″ long)

Gently pull a few strings on each side so there is a bit of fraying. This is the look that I chose to go with. If you want your apron perfectly hemmed then make your strips a bit wider and iron/sew on a small hem on each side of each ruffle strip. I didn’t think it was worth the time, personally.

I have a gathering foot, but if you don’t then it is still very simple to create a ruffle. Baste straight down the center of your strip. (Meaning use a very long stitch.) DO NOT BACKSTITCH ON EITHER END!

Grab one of the strings on one end of the ruffle. Gently pull the string as you gather/push the fabric to create bunching and ruffling, as shown below.

One your ruffles are evenly spread pin them to your apron front. I put one close to the top and three on the bottom, each far enough that they wouldn’t get caught in the machine when I was sewing around the outside of the apron, about 1 inch. I pinned them carefully and left the extra edges hanging off, even on the neckline.


Using a regular straight stitch, slowly sew down the center of each ruffle to secure it in place.

Remove the pins and prepare to follow the instructions on the PDF pattern precisely. After you sew around the outside (with the right sides together) be sure to trim down the excess ruffles so that the apron with turn/reverse and iron down nice and neat.

What do you think? I am thrilled by how it turned out! Isn’t my little lady just the cutest miniature chef you have ever seen??


Fingers crossed for a sunshiny day!
If you enjoyed this post then stick around! Here are a few of my favorites:

Creamy Spinach Tomato Tortellini


Latest posts by Sarah Westover McKenna (see all)
- Harry Potter Birthday Party - March 22, 2019
- Christmas Caramels - December 14, 2018
- Christmas Sugar Cookies Recipe - December 12, 2018
Absolutely adorable!! It’s super cute!! Thanks so much for the tutorial!! Pinned 🙂
Thanks Crystal!
So pretty! Love all the bright colors and ruffles!
Thank you Katie!
How adorable!! My daughter loves baking with me and has been asking for an apron to wear when she bakes. 🙂 Thank you!
This is so cute Sarah and Jade is just so adorable! love all of the colors together!
Thanks, Jenn!
That is so SO adorable! My son loves helping in the kitchen too and says he wants to be a chef when he grows up!
Thanks Amy!
I LOVE this-so adorable and what fabulous colors!
Thank you, April! 🙂
Thank you for this tutorial. I found it from another person’s blog on pinterest, and I made this apron as a gift for my niece thank you! I’m going to be posting it on my blog as well!
Yay! I would love to see a picture!
This was my first non burp cloth sewing project. Success! ! Thanks for the step by step instructions regarding ruffles. I’m feeling very accomplished right now. I think my 3 year old will love her apron.
YAY!!!!!!!!!!!!!!!!!!!!!!!!!!!!!!!!!!!!!!!!!!!!! This made my night!
Oh my goodness! That is such a adorable apron… love the colors and patterns you picked for your tutorial. I’m not much of a sewer, but I am thinking this is something I could actually handle. My little one is really into helping me in the kitchen, so I think she might be thrilled with me making her her very own apron. Thank you for sharing!
Cheers,
Lisa
I love this! I want to make one for myself! What a fun apron to bake in! Thanks for sharing at Dishing It & Digging It!
Adorable little apron. My granddaughters would love one. Thank you for sharing your toddler apron tutorial at the Snickerdoodle Create~Bake~Make link party! I am featuring you today at Snickerdoodle.
Thank you for the feature! 🙂