This boxy pencil pouch sewing tutorial is perfect for back-to-school! It is so cute and will help keep track of those stray pens and pencils!

Every year, I’m always surprised at how short summer is. Just as we’re getting into our summer groove – BAM – it’s time to start thinking about getting the kids back to school! It always makes me sad. I wish summer could last forever!
But time marches on, and I like to come up with little sewing projects that bring out the fun of back-to-school. And what is better about back-to-school than all the school supplies, amiright?
This year, I made this boxy pencil pouch for my daughter to keep up with all her new pencils and pens. She’s taking art classes in high school so there are allllways tons of pencils and pens!
I’ve got a free sewing pattern and tutorial for you below.
It’s quick to sew and shows off a fun fabric print. Novelty prints are especially fun for this pouch! I treated myself to this Cotton + Steel pen print. I love the colors and the pens are such a fitting design for a pencil pouch, don’t you think?

I used a bright yellow solid for the lining. I’m loving how it pops with that royal blue zipper!

Finished measurements are approximately 8” long x 2.25” tall x 2.25” deep.
I added a swivel hook at one end so you can attach it to a backpack, but that is totally optional. I can guarantee you that your boxy pencil pouch would also be cute without the swivel hook.

Want to make one of your own? Here’s how!
Materials:
1 fat quarter for bag outside and tabs
1 fat quarter for bag lining
Fusible fleece
14” (or longer) nylon zipper. (You could use an 11” zipper but I prefer using a longer zipper and trimming it down after it’s sewn in.)
pper1” swivel hook
Prepare your pieces:
Cut out all pattern pieces.
Following manufacturer’s instructions to fuse fleece to the back of the Bag Body pieces (main fabric). The fleece will be shorter at the notched ends. That’s okay –we’re going to take larger seam allowances at the ends.

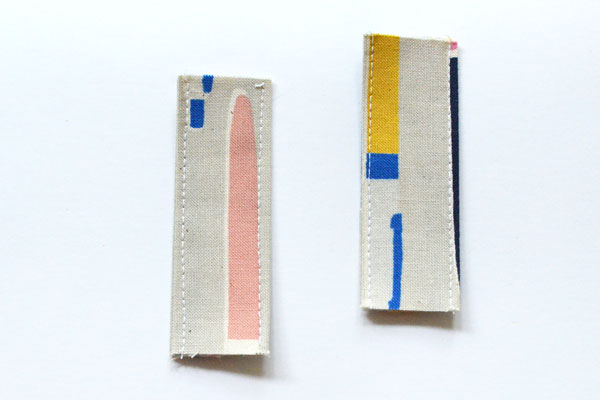
Create tabs:
Press tab pieces in half the short way to create a piece 2” x 3”. Open up and press raw edges to the center.
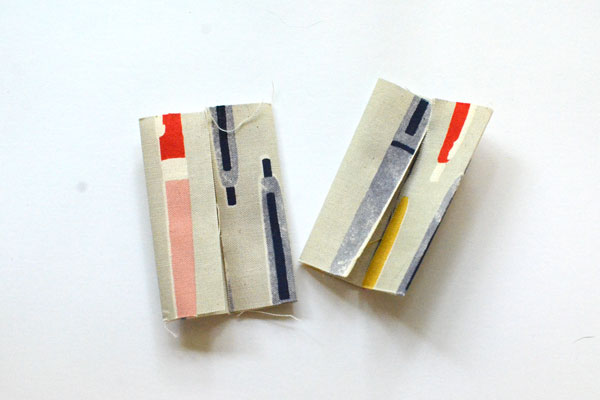
Re-fold at the middle crease and stitch down both sides close to the edge.
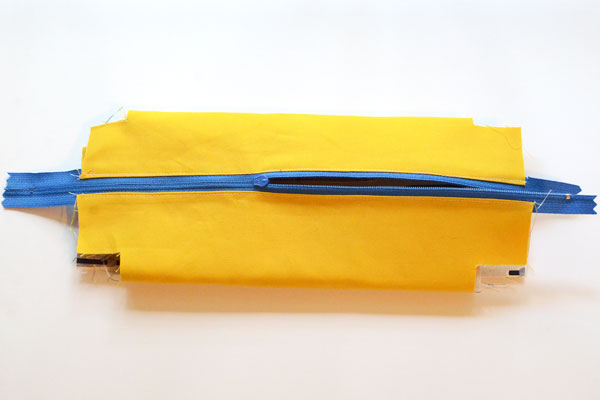
Install the zipper:
Now to sew the zipper to the bag pieces. Start by making a sandwich with your zipper and bag pieces. Layer an outer (main fabric) piece face up, then the zipper face down along one edge, and then the lining face down.
I like to use a zipper longer than the bag pieces so I can let the top of the zipper stick out past the fabric by an inch or so. This puts the zipper pull on the portion of the zipper tape above the fabric, so I don’t have to mess with stitching around the pull when I’m sewing the zipper in.
Use a zipper foot to sew along the zipper.
If your zipper is the same length as your fabric, you’ll need stop stitching when you get to the zipper pull. With the needle down into the fabric, raise the presser foot and pull the zipper pull past where you’re stitching. Put the presser foot back down and resume sewing.
Turn right side out. Press.
(Sorry, I forgot to get a picture of this step.)
Use the same process to sew the zipper to the other side of the bag pieces.

Topstitch the fabric down both sides of the zipper.

Assemble the bag:
Unzip the zipper at least halfway.
Flip the layers so the outer bag pieces are right sides together, and the lining pieces are right sides together.
Stitch the outer bag pieces together down long side with ¼” seam allowance. Stitch the lining pieces together down long side with ¼” seam allowance.

Turn the whole thing right side out. It’s starting to look kind of like a zipper bag now. Go ahead and give the seams you just sewed a press.

Now, turn it all inside out so the lining is now on the outside.
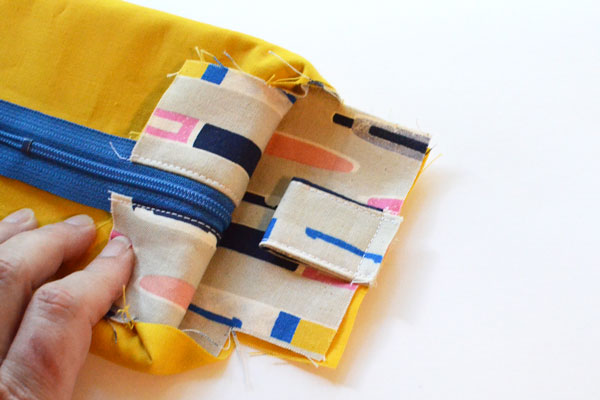
Take one of your tab pieces and thread it through the end of the swivel hook and bring the ends together, creating a loop.
Pin the tab to the bottom of the unzipped end of the bag, centered across the seam and with raw edges touching and right sides together.

Baste in place with a ¼” seam allowance.

Take the remaining tab and fold in half so raw edges are touching. Pin to the bottom of the zipped end of the bag, centered across the seam with raw edges touching and right sides together.
Baste in place with a ¼” seam allowance.
MAKE SURE THE ZIPPER IS UNZIPPED. I put that in all caps because it’s super important. You won’t be able to turn your bag right side out at the end if the zipper isn’t unzipped.
With the bag still turned inside out, stitch across the ends with a seam allowance. On the unzipped end of the bag, you’ll need to butt the ends of the zipper together as you stitch over them.

The ½” seam allowance is a larger seam allowance than we’ve been using, but it gives more leeway to line things up if any of your layers have shifted out of place.
Trim your seam allowance to ¼”.

Zig zag over the edges to prevent fraying.
After I’ve sewn my ends closed, I like to take this time to go ahead and square up those notches cut out of the corners. It’ll make the next step easier.
Now to box the corners. Open up the corners and then squash them so the cut out notches become a straight line.

Sew with a ½” seam allowance.

Trim to ¼” and then zig zag over the raw edges to prevent fraying.

Turn it all right side out. Your boxy pencil pouch is finished!


Here are some of my other tutorials that you are sure to love:


Easy Oilcloth Post-It Note Holder

Latest posts by Anne Weaver (see all)
- Spring Flower Tote Bag – Free Sewing Pattern - April 6, 2024
- St. Patrick’s Day Shamrock Banner Free Sewing Pattern - March 7, 2024
- Upcycled Sweater Valentine Zipper Pouch Sewing Tutorial - February 12, 2024
What should the finished length of the pattern pieces be? I’m worried I’m not lining up the pieces probably once I’ve printed and cut.
When the pages are taped together, the Boxy Pencil Pouch Interlining piece should be roughly 10 3/8″ long. The Boxy Pencil Pouch piece should be 11.5″ long. Hope that helps! –Anne
Thanks for this tutorial. It’s perfect!
I just made one and it turned out great! Is there a printable file I can download to add to my “favorites file?”
No printable file is available, sorry.
I used fusible foam lining to make a padded case to hold my portable Bluetooth speaker. It’s perfect! Thanks for an easy-to-follow tutorial!
Awesome!!
When I downloaded the pattern it appears on 2 different pages, sideways. Is this correct?
The pattern is 4 pages that you’ll need to tape together to get the full pattern pieces. There are 2 pattern pieces – 1 for the main bag (outer fabric and lining) and 1 for the interlining (fusible fleece). The 2 pieces look almost identical, except that the interlining piece is 1/2″ smaller all the way around. The pattern pieces are labeled so once you get the pages taped together you’ll be able to tell which is which. Pages 1 and 2 go together to make the Interlining pattern piece. Pages 3 and 4 will make the main bag pattern piece.